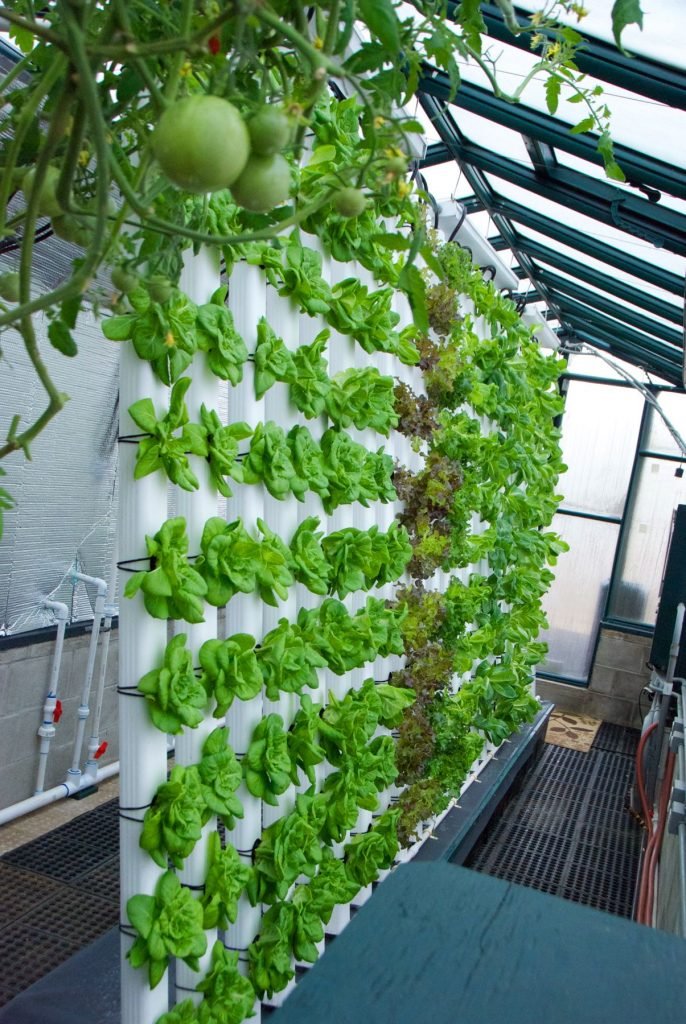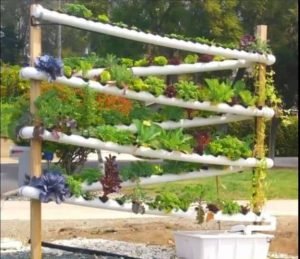
Vertical aquaponics simply refers to an aquaponics system that goes upwards. This can increase the amount of growing space you have without the need for more floor space. When you have limited room in or outside your home this can be an attractive option.
A simplified version of vertical aquaponics is the standard IBC tote set up; where the grow bed is positioned on top of the fish tank. But, this is only one layer; a true vertical system will focus on growing as many plants as possible on top of each other.
The trick to a successful vertical aquaponics system is to ensure there is enough room for each plant to grow and have adequate light; while minimizing spacing between plants. The advantage of the vertical towers is that you can have crops effectively growing above each other. This allows a single 5ft tall vertical aquaponics tower to sustain the same number of plants as a hydroponics system that occupies 10ft by 6ft but only operates on one level.
Why Vertical Aquaponics Is So Successful
 The principle is to use tubing to create lots of small pockets where plants can grow. The most common tubing is PVC which is why vertical aquaponics is often referred to as PVC aquaponics (is PVC food-safe?). Your vegetables or other crops are grown without soil. The vertical garden is generally created above the fish tanks to keep the system as simple as possible.
Your fish will need to be fed and the water temperature, pH, nitrates and ammonia levels monitored. A small pump will then take the water which is full of nutrients and drop it into the top of the cylindrical tubes which form the vertical aquaponics towers. The water glides down the inside of the PVC aquaponics pipes and gives your plants the nutrients they need.
Air will flow through the pipes providing the plants with the oxygen they need directly to the roots as well as via the leaves. The air will flow around the tubes as the water will not fill the tubes completely.
If your aquaponics towers are working properly the plants will clean the water before it goes back to the fish; your fish and plants will grow with minimal intervention from you.
The system is basically self-contained although you may need to add a little water occasionally.
However, it is important to note that the PVC vertical aquaponics system described below will need to have a filter in it. This will need to be positioned before the water is taken to the plants. The reason is simply to remove any solid waste. If you don’t, the waste will attach to the roots of the plants and prevent them from getting the nutrients they need.
IF you’re using a conventional system with grow beds then the bacteria will remove all waste products but this is not the case in a PVC vertical aquaponics system.
How To Build Your Own Vertical Aquaponics System
This is not actually difficult; all you need to do is follow these steps and then you can start enjoying the fruits of your labor.
You’ll need:
- 4-inch diameter pipes; approximately 20ft
- 4-inch diameter elbows: between 4 and 6
- 4 inch T connectors: between 4 and 6
- 100-gallon container
- Aquarium Tubing – approximately 20ft
- 4-way splitter- for the 1-inch pipe.
- Plastic cups
- Scraps of cloth
- Electrical tape
- Aquarium pump capable of moving 400 gallons per hour
- Filter
It is worth noting that almost any fish can be used in this type of system. However, if this is your first aquaponics vertical tower system you may be best to choose tilapia; providing your local climate allows it. They are generally extremely hardy and inexpensive.
In terms of plants, the best options are leafy vegetables, herbs and even tomatoes (although these are usually better when you have a mature system as they demand a high level of nutrients).
These will not take up so much space that the other plants don’t get light but they will grow large enough to give you a good harvest. They also complement each other if you want to grow a variety of plants.
Step 1 – The Pipe Work
The exact amount of 4-inch pipe you use will determine how large your completed aquaponics towers are or how many of them you have.
A good starting point is to create eight one foot long pieces. In six of these pieces you can use a hole saw to create two holes; evenly spaced.
You can then drill a 1-inch hole into one of the one foot long pieces that don’t already have circular holes in it. This is where the water will trickle back into the fish tank.
Step 2 – Putting the Pipes Together
Now lay out your pipes in the following order. One 90° piece, a 1 ft piece, a T junction, 1 ft piece, T junction, 1 ft piece and 90° bit.
Do this again and you should be able to use the two extra & ft pieces (1 with the drainage hole in) to join the whole lot together in the shape of a rectangle.
Electrical tape or similar tape can be used to join all these pieces together. Make sure all the T junctions are facing the same way; upwards. The holes in the pipes should also be facing upwards with the exception of the drain hole which should be on the inside of the rectangle.
Step 3–Add The Upright Pipes
This is where you are really going to gain growing space and room with your DIY vertical aquaponics system.
Cut 4 pieces of the 4-inch diameter pipe. They should be between 2 and 3 feet long each; depending on how much height you have where you are putting your vertical aquaponics system.
These pipes will slot into the T junctions, like 4 chimneys in your PVC aquaponics universe.
But, before you do this you’ll need to add holes to your DIY vertical aquaponics set up. You need to use your 1-inch hole saw to drill 5 holes in the side of your pipe; make sure they are evenly spaced. Turn the pipe 90° and drill another 4 holes; the height should sit between the holes you’ve just drilled. Keep turning the pipe and repeating this, 5 holes then 4 holes until you’ve covered the whole pipe in alternating holes.
Now repeat this with the other 3 vertical aquaponics pipes. These are the main growing holes. As you can appreciate you’re likely to have between 18 and 25 holes in each of your pipes. Each of these holes represents a plant; that’s as many as 100 plants in 4 tubes.
Step 4 – Position Your Vertical Aquaponics System
It’s now time to decide where your vertical aquaponics system is going to sit. If you’ve used an IBC tote then it will already have a frame. You may have preferred to use an alternative container or even two 50 gallon drums.
Whatever you’ve decided to keep your fish in, make sure they are food grade containers and that you have given them a good wash first.
Then position them in your desired location and make sure they are well supported if necessary.
It is important to consider your access to the fish tank; you may need to check on your fish, feed them or even remove them if there appears to be an issue.
It is also important to cover the fish tank with a dark material or even paint it. This will prevent the sunlight from getting into the water; which can cause algae to grow and damage the balance of your vertical aquaponics system.
Step 5 – Add The Vertical Garden
You know need to place the PVC aquaponics vertical towers on top of your chosen fish tank. It is important to make sure the weight of the planting pipes is distributed across the whole of your tank; too much weight in one spot could give you issues as the plants grow.
If the system is outside you should also consider the wind factor; the pipes are relatively light you don’t want them being blown about; it may be necessary to devise your own system to clamp them in position.
Now is also a good time to cut a small section of aquarium pipe and insert it in the one-inch drain hole you created earlier.
Aquarium pipe should drop downwards, reducing any issues with water flow.
It is essential to note that a slight angle on your PVC towers will ensure all the water flows to where the drainage hole is; ensuring it gets back to the tank.
Step 6 – Add Cups
The vertical holes should not need cups but if you don’t put any in the horizontal ones then your plants will either be washed out of the way or their roots will block up the pipes.
To help prevent this you need to spike half a dozen holes into the bottom of the plastic cups and then drop them into the horizontal holes.
Step 7 – Grow Media
The plants need to grow in something and they need to be able to get to the nutrients in the water. To do this you’ll need to get some Rockwool or some pond filter foam. This is perfect for wedging into the holes you’ve cut in the vertical tubes. Your seeds can be pushed into this foam or you can make a small hole to put them in.
Before you insert them into the pipes it is a good idea to hang strips of burlap sacks or similar material inside your vertical tubes. This will absorb the water; slowing its flow down the pipes and back to the fish tank.
In the process, the slower water can be absorbed by the foam and the seeds or small plants can get the nutrients they need to grow.
The burlap will also give the roots something to fasten to; this will secure each plant in its position and help to prevent the roots from blocking the pipes.
Step 8 – The Pump
You’ll need to have a good quality pump; it’s worth spending a little more to invest in one that has a good reputation as if this breaks then the fish and plants could die.
As already mentioned, the pump needs to be capable of pumping 400 gallons of water per hour; this will ensure the water remains aerated and the water is cycled. However, you may need a more powerful pump if your vertical aquaponics system is exceptionally high.
The pump is situated in the fish tank. Ideally, it should be raised above the bottom so that the fish will be able to swim under it without getting stuck. Read on how to select the best pump here.
You’ll need to attach some of your aquarium tubings to the pump; the adaptor should be supplied with the pump for the 1-inch tubing.
This can then be fed up to the top of your vertical column. Here you’ll need to split the pipe through a series of adaptors so that the water will reach the top of each of the columns. If possible one 4 way splitter is best to ensure the flow of water is even to all the vertical columns.
If this is not possible then you can split it into two and then each side into two again; to keep the flow even.
At this point, it is a good idea to put some water in your tank and test the system. You don’t want to be spraying water off to the side thanks to a bad join.
Top Tip: It’s a good idea to warm the pipes in hot water before you slide them onto a join; this will help them to go on easier and seal in place.
It is important to mention that if you have opted for two 50 gallon barrels you’ll need to have the pump situated in one barrel and the return drain going into the other. You’ll also need to connect the two barrels with your pipes to ensure the water flow around the whole of your vertical aquaponics system.
The best way to do this is to set a pipe in the return barrel high enough so that the fish in this barrel will always have enough water; this then feeds into the other barrel whenever the level in that barrel starts to drop.
Step 9 –Fish & Plants
You are now ready to add your water and let it settle before adding fish than plants. This is the bit that takes the longest as you need the water to be de-chlorinated which can take several days.
You’ll also need to check the pH levels, ammonia, nitrates, and even the temperature before you can add fish.
It is best to add a couple of small fish first to help get the ammonia levels up and encourage the arrival of bacteria to turn this ammonia into nitrates for the plants.
You’ll then be able to start adding plants and more fish. Click here to find out the perfect fish to plant ratio.
Start Your Vertical Aquaponics System Today
The vertical aquaponics system is perfect for anyone just starting in aquaponics; especially if you have limited space available.
Once you’ve got the system up and running you can grow virtually anything in your vertical aquaponics system; all you have to do is be prepared to try!
Read more:
- Best plants for Aquaponics
- Best fish for Aquaponics
- How to choose the right pump for your aquaponics system

Nick loves building, managing and giving others advice on aquaponics. He created this website to do just that. He is the author of Aquaponics for beginners. If you got a question contact him here or read more on the about page here.

